guides
Two-Monitor Ergonomic Setup Guide
Everything for a two-monitor desk: monitor arm picks, ergonomic positioning, cable management, and display settings for Windows and Mac.
 Daniel Osei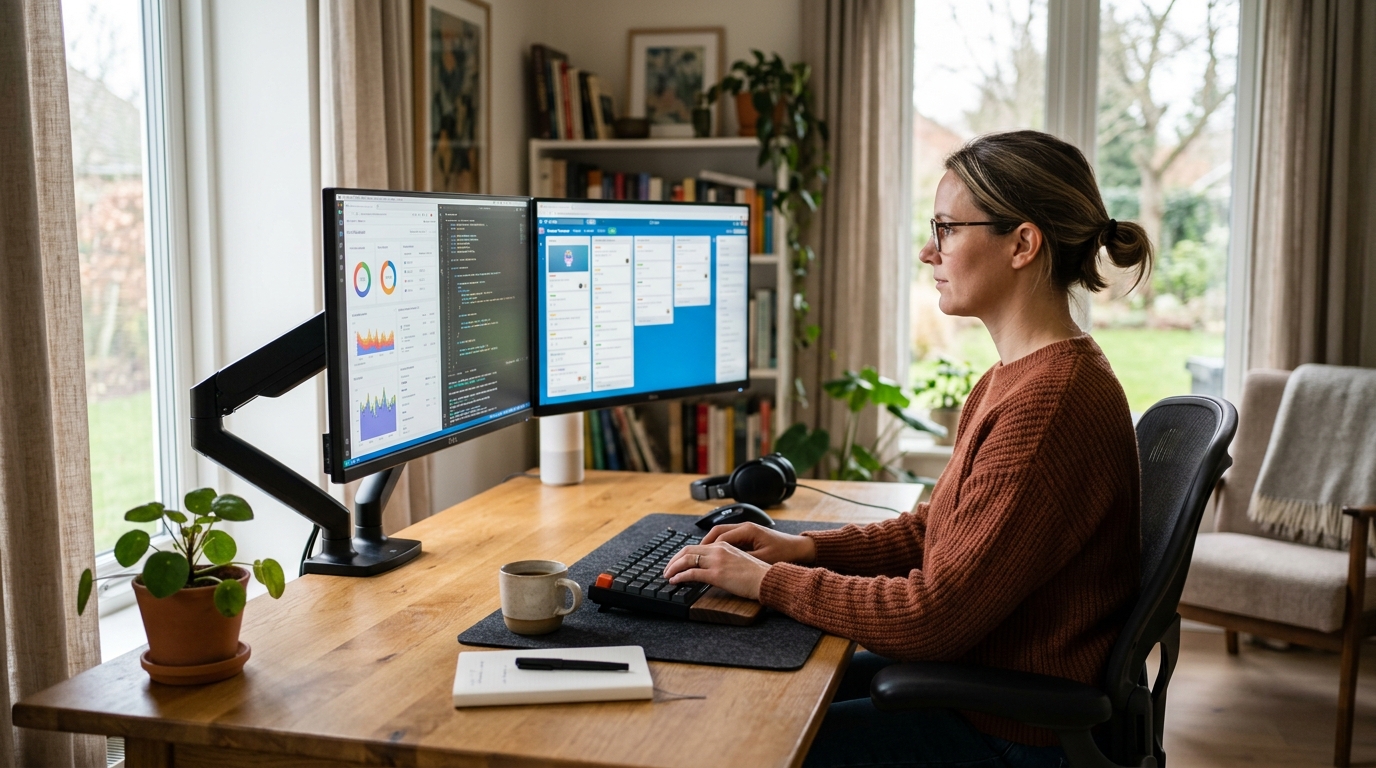
A two-monitor setup doubles your visible workspace and eliminates the Alt+Tab habit that fragments focus — but only if hardware and positioning are planned from the start. Position the primary monitor centered at your nose, both screens at the same height with top edges at eye level, inside edges nearly touching. Done right, you gain the productivity and avoid the neck pain. This guide covers the full journey: desk planning, hardware selection, ergonomic placement, cable management, and software configuration.
How much desk space does a two-monitor setup need?
Two 27-inch monitors placed side by side span approximately 56 to 58 inches across, measured bezel edge to bezel edge. You need at least 48 inches of desk width to fit both screens at correct arm-length viewing distance (24 to 28 inches from your eyes) and still have 12 to 14 inches of depth for a keyboard and mouse in front. A 60-inch desk is comfortable; 72 inches gives generous room for peripherals, a document holder, and anything else that lives on the desk surface.
Two 24-inch monitors side by side span approximately 48 to 50 inches. Two 32-inch monitors span roughly 66 to 68 inches — a configuration that needs at minimum a 72-inch desk to position the screens far enough away to avoid reading at uncomfortably close range.
Stacked configuration for narrow desks
If your desk is narrower than 48 inches, a stacked configuration keeps the horizontal footprint of a single monitor while still doubling your screen count. The primary monitor sits at normal eye level directly in front of you; the secondary screen mounts above it on a dual stacking arm. The trade-off is real: reading the upper screen requires neck extension that accumulates during long sessions. Reserve the top screen for content you glance at — chat, calendar, dashboards, music players — rather than documents you read for sustained periods.
Desk surface and stand footprint
Two separate monitor stands consume significant desk real estate — typically six to eight inches of stand footprint depth per monitor, plus the full base width. Stands also rarely allow precise independent height adjustment between monitors of different sizes. A dual monitor arm mounts on a single clamp at the desk edge and lifts both screens above the desk surface on articulating arms, clearing 60 to 80 percent of the desk surface that two stands would occupy. For a two-monitor desk, a monitor arm is the single most practical hardware decision, not an optional accessory.
Choosing the right monitor arm for two screens
Two hardware approaches exist: a dual arm (one pole, two extending arms from the same clamp) and two independent single arms clamped separately. Dual arms save desk real estate and centralize cable routing. Two independent arms offer more positioning flexibility when the monitors differ significantly in size or when the desk edge cannot accommodate one wide clamp spanning both screens.
Best for users wanting precise independent height and tilt for two monitors on one desk clamp
Ergotron LX Dual Stacking Monitor Arm
The Ergotron LX Dual Stacking Arm mounts two independently articulating arms on one C-clamp or grommet base, supporting monitors up to 17.6 lbs each. Each arm adjusts height, tilt, pan, and rotation independently — essential for matching the top edges of two different-size monitors to exactly the same eye level. The gas spring mechanism holds any position without drift and allows one-handed repositioning. Internal cable channels route video and power cables invisibly along the arm structure from screens to desk. The 10-year warranty is the longest in the category. At $230 to $280, it costs more than budget alternatives but eliminates the wobble, limited range, and height drift that make cheaper arms frustrating to use within a few months.
★★★★★ 4.7 · 4,100 reviews
Check current price on Amazon→Best for budget-conscious users with two same-size monitors up to 27 inches
VIVO Dual Monitor Desk Mount
The VIVO Dual Monitor Desk Mount is the most-purchased budget dual arm and handles screens up to 27 inches and 17.6 lbs each. It uses a spring-tension adjustment mechanism rather than gas spring, meaning repositioning requires a hex key rather than simple hand pressure. Height range covers seated users from 5 feet 2 inches to 6 feet 2 inches. The clamp mount fits desk edges up to 3.9 inches thick. At $50 to $70, the trade-off is more friction per adjustment — fine if you set the arms once and leave them, less ideal if you frequently reconfigure. For static setups with two matching monitor sizes, this arm overperforms for its price.
★★★★☆ 4.4 · 12,000 reviews
Check current price on Amazon→Ergonomic positioning: the essential numbers
Positioning two monitors builds on single-monitor ergonomics with a few additional requirements. The measurements below cover the most critical points. For a complete step-by-step positioning walkthrough, see the full dual monitor ergonomics guide.
Height: Both monitors should have their top edges at your eye level — not the center of the screen, the top edge. This is the most common misconfiguration in dual setups. For monitors of different sizes, the bottom of the larger monitor will sit higher than the bottom of the smaller one when top edges are properly matched. A dual arm with independent height adjustment per arm is required to achieve this with mismatched screen sizes.
Distance: Each monitor should sit 24 to 28 inches from your eyes when seated with your back against the lumbar support. In a standard side-by-side layout with inside edges nearly touching, both screens naturally fall at approximately the same distance from your eye position.
Angle: In a primary-and-secondary layout, the primary monitor faces directly forward (no horizontal rotation) while the secondary angles inward 15 to 20 degrees toward your centerline. In an equal-use layout where you split time evenly between screens, each monitor angles inward 15 to 20 degrees so the rotation is symmetric. See monitor height guide for the exact measurements.
Tilt: Both monitors tilt so the top edge angles slightly away from you — approximately 10 degrees from vertical. This compensates for the natural 15-to-20-degree downward resting gaze angle and prevents neck extension when reading the top portion of each screen.
| Product | Best for | Rating | Notes | |
|---|---|---|---|---|
| Side-by-side: primary and secondary | Most users | ★★★★★ | Primary at nose center, secondary angled inward 15-20 degrees. Best for 80/20 or 90/10 split workflows. | Check price |
| Side-by-side: equal-use layout | Equal-split users | ★★★★☆ | Both monitors angled inward equally, seam centered. Works well for traders and developers with two heavily-used screens. | Check price |
| Stacked: primary below, secondary above | Narrow desks | ★★★★☆ | Preserves desk width. Secondary screen should carry reference content only, not primary reading tasks. | Check price |
The single most common positioning error in dual-monitor setups is centering the gap between the two monitors at the nose. Unless work is genuinely split 50/50 between screens, center the primary monitor at nose level and place the secondary to whichever side is natural for your workflow. Chronic neck rotation toward a poorly placed secondary screen builds cumulative strain that becomes apparent after weeks, not days.
Cable management for a two-monitor desk
A two-monitor setup doubles the cable count: two power cables, two video cables (DisplayPort or HDMI from each monitor to the computer), and optionally two USB cables if the monitors include built-in USB hubs. Without a plan, this becomes a tangle of eight cables within a week.
Route cables through monitor arm channels first. Both the Ergotron LX and most mid-range dual arms include cable channels along the arm structure. Thread the video and power cables through these channels before fully tightening the arms to final position. This keeps cables invisible from the front and prevents slack loops behind the desk.
Add a cable raceway along the desk edge. A cable management raceway is a channel mounted to the back or underside of the desk that collects all cables running from the monitor arm to the computer or floor outlet. It keeps everything in one organized path rather than spread across the desk surface. A cable management kit with a raceway, cable ties, and velcro straps handles a full two-monitor build for under $30.
Mount a power strip under the desk. A power strip with a switch mounted under the desk with velcro cable mounts eliminates floor-level cable runs to the wall outlet. Monitor power cables run from the screen down the monitor arm and back up to the under-desk strip rather than crossing the floor.
Zip tie excess slack. After routing, gather remaining cable slack into loops and secure with small reusable zip ties. Attach the coils to the monitor arm pole or the underside of the desk. Reusable zip ties (not single-use) allow adjustment without cutting if you later reconfigure the setup.
Software and display settings
After the physical setup, the display software settings determine whether two monitors actually function as one coherent workspace.
Windows display settings
Open Settings > System > Display. Windows detects both monitors automatically in most cases. If not, click Detect. Drag the display arrangement thumbnails to match the physical position of your monitors — left screen on the left, right screen on the right. Set the monitor you use for primary work as the Main display; this controls where the taskbar appears and where full-screen applications open by default.
For scaling: if monitors are the same resolution and size, use identical scaling on both. If one is a 4K panel and the other 1080p, set scaling to match apparent text size (typically 200 percent on 4K, 100 percent on 1080p) so text appears the same physical size on both screens. Mismatched text size between screens forces constant visual recalibration and slows productivity.
macOS display settings
Open System Settings > Displays. Drag the arrangement thumbnails to match your physical layout. The white menu bar indicator above one display thumbnail marks the primary screen — drag it to the monitor you use most. For an extended desktop (the standard dual-monitor workflow), both monitors should appear as separate rectangles rather than a mirrored configuration.
For Macs with Apple Silicon, verify that the secondary external display is connected through a supported interface. Older M1 Macs support only one external display natively; a second external display requires a USB-C hub with DisplayLink chip support.
Brightness and color temperature matching
Mismatched brightness is the primary driver of eye fatigue in dual-monitor setups. Open each monitor’s on-screen display menu and set both to the same brightness percentage. For a practical match: open a plain grey browser tab or document window and drag it until it spans both screens, then adjust brightness until the grey looks identical on both sides. For color temperature, 6500K is standard for general office work; 5000K to 5500K reduces blue light exposure for evening use. If one monitor lacks color temperature control, consider a free software utility like f.lux (Windows/macOS) to adjust both displays in software.
Two-monitor setups for specific use cases
Software developers
Developers typically use the primary monitor for the code editor full-screen — the screen receiving constant reading and writing — and the secondary for a browser, terminal, documentation, and communication tools. The code monitor should be the primary, directly in front, since it receives the most visual attention. Many developers rotate the secondary monitor 90 degrees to portrait orientation, which displays significantly more terminal output or log file lines vertically.
Graphic designers and video editors
Creative workflows benefit from having the primary application — Figma, Premiere, Lightroom, After Effects — full-screen on the higher-quality monitor, ideally the one with better color accuracy and higher resolution. The secondary screen carries panels, asset libraries, and reference images. Color-accurate monitors covering at least 99 percent of sRGB are the better primary screen choice. The secondary monitor for panels does not require the same color accuracy standards.
Remote workers and writers
Writers and remote workers often benefit most from a simple split: primary monitor for the main document or application, secondary for communication — email, Slack, video calls, and calendar. In this configuration, the secondary monitor can be a smaller 24-inch screen since it carries communication interfaces rather than the detailed document content that benefits from a larger screen.
Common two-monitor setup mistakes
Centering the gap at your nose. Unless work is genuinely split 50/50, primary monitor at nose center with secondary to one side reduces cumulative neck rotation significantly. This is the most impactful positioning decision in the entire setup.
Mismatched heights. Two monitors at different heights force looking up at one screen and down at the other throughout the day. Top edges must match. A dual arm that adjusts each arm independently is the practical way to achieve this when monitor sizes differ.
No monitor arm. Standard monitor stands occupy significant desk depth and rarely allow precise height matching between monitors of different sizes. A dual arm is the enabling hardware for a well-organized two-monitor desk, not optional.
Cables crossing the floor. Power and video cables running from wall outlet to monitor across the floor are tripping hazards. Under-desk power strips and cable raceways solve this completely.
Display scaling left mismatched. Text that appears visibly larger on one screen than the other forces constant visual adjustment when shifting gaze. Set scaling so text appears the same physical size on both displays.
FAQ
Frequently asked questions
Do both monitors need to be the same size?
Do I need a docking station for a two-monitor setup?
Can I use two different monitor brands?
Which video cable should I use: DisplayPort or HDMI?
Should both monitors run at the same refresh rate?
Bottom line
A two-monitor setup done right — primary monitor centered at your nose, both screens at matching eye-level height, a dual monitor arm for precision and surface space, cables managed, software scaled to match — produces a productive workspace without the neck strain that a poorly planned dual setup creates. Buy the monitor arm first, then manage cables, then configure display settings. The full physical setup takes under an hour.
For next steps: how to set up dual monitors ergonomically for the full positioning walkthrough with measurements, dual monitor vs ultrawide if you are still deciding between configurations, best monitor arms for more arm options at every price point, and the ergonomic office setup guide for the complete workstation — chair, desk, keyboard — in the same measurement-focused format.