guides
How to Set Up an Ergonomic Home Office for Video Calls
Optimize your home office ergonomics for video calls: webcam height, face lighting, mic placement, and posture tips to look and sound sharp on Zoom.
 Daniel Osei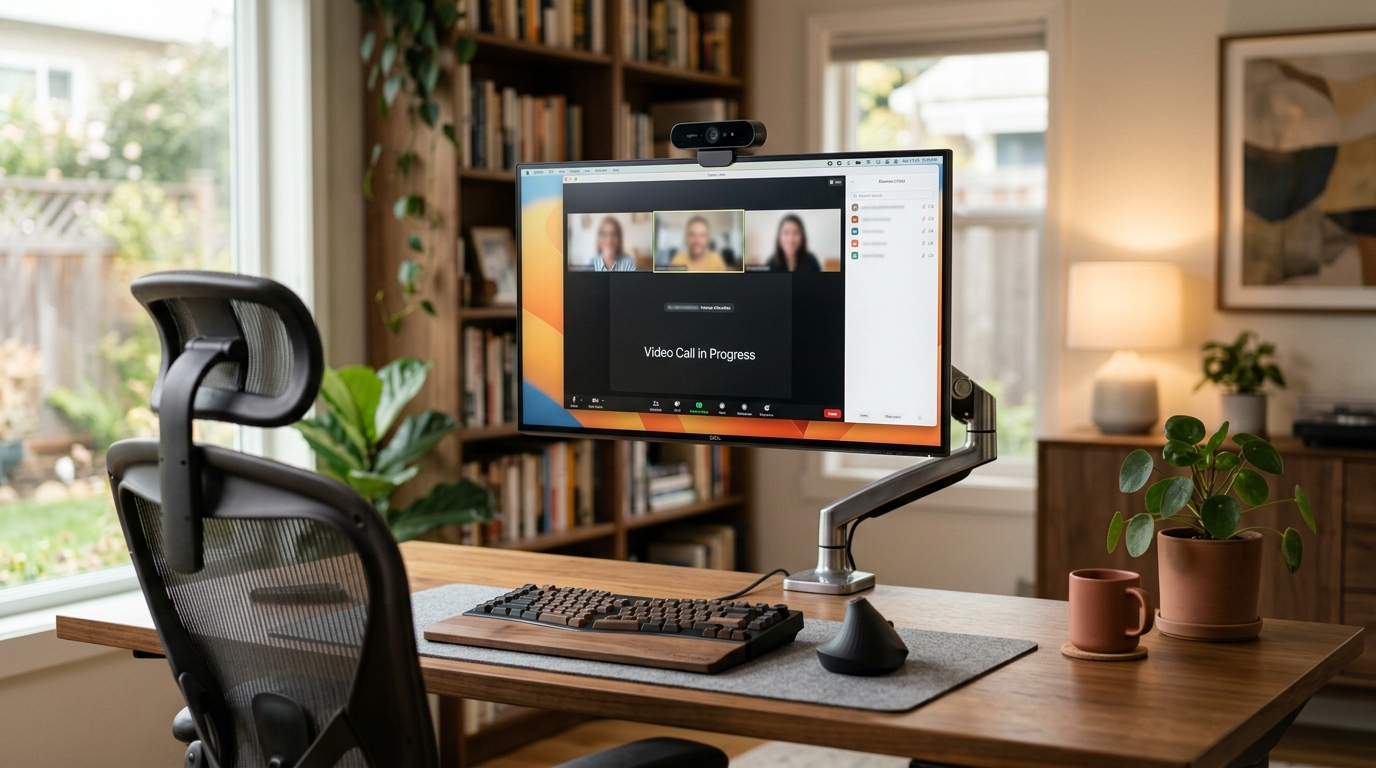
To set up an ergonomic home office for video calls, place the webcam at eye level (not below the monitor), position a key light 45 degrees to your face, keep the microphone within 12 inches of your mouth, and nail the chair and monitor basics so you do not crane your neck toward the camera during calls.
Why video call ergonomics differ from standard desk ergonomics
Standard desk ergonomics optimizes for screen focus: correct monitor height, neutral wrist position, supported lower back. Video calls add a second constraint — the camera must see your face at a flattering angle while you maintain that same neutral seated posture. These two requirements can conflict.
The most common failure mode is the laptop flat on the desk with its built-in camera. The camera looks up at you, you tilt your head down toward it to maintain eye contact, and you spend two hours in neck flexion. That is one of the fastest paths to tech-neck pain for remote workers who are otherwise ergonomically careful at their desk.
The goal is a setup that satisfies both requirements simultaneously — proper seated posture and a professional camera angle, with no compromise between them.
How to set up an ergonomic home office for video calls: 8 steps
Step 1: Set your ergonomic baseline before touching the camera
Before positioning any call-specific equipment, verify the seated ergonomics:
- Chair: Seat height so feet rest flat on the floor, hips slightly above knee height.
- Desk: Surface 1–2 inches below elbow height when arms hang relaxed at 90 degrees.
- Monitor: Top edge at eye level, 24–28 inches from your face.
If these are already correct (the ergonomic workstation setup guide covers each step in detail), move on. If not, fix them first. A camera setup built on a bad ergonomic foundation will create new pain while appearing to solve the old one. The next seven steps assume this baseline is in place.
Step 2: Position the webcam at eye level
Place the webcam at eye level or 1–2 inches above it. At that height, you look directly into the lens rather than up or down, which reads as engaged and present to the other participants.
The laptop-on-desk problem: A 15-inch laptop sitting flat on a desk positions its camera 4–6 inches below eye level for most adults. Propping the laptop on a laptop stand ($20–60) raises the screen and built-in camera closer to eye level immediately. Add an external keyboard so typing height is not forced up with the screen.
The monitor-mounted webcam: Most webcams clip to the top of the monitor. If your monitor is already at the correct eye-level height per step one, the clipped webcam sits 1–2 inches above eye level — nearly perfect. If your monitor is still on a low factory stand sitting below correct height, the webcam is also too low.
The solution: A monitor arm like the Ergotron LX ($170–220) raises any monitor to the correct height and naturally brings the clip-on webcam with it. It is the single upgrade that fixes monitor height, neck posture, AND webcam angle in one move. For users who want a webcam position independent of the monitor, a small adjustable webcam desk stand ($15–40) gives full height flexibility without touching the monitor setup.
Step 3: Choose a webcam with at least 1080p 30fps output
The built-in camera on most laptops outputs 720p with poor low-light performance. An external webcam resolves this for $70–120.
The Logitech C920 is the established standard for home video calls — 1080p at 30fps, solid low-light auto-correction, and native compatibility with Zoom, Teams, Google Meet, and every other platform without drivers. At $70–90, it eliminates the most common video quality complaint without budget strain.
For users on frequent all-hands calls or client-facing video, the Logitech Brio 4K ($150–200) adds 4K 30fps and HDR. The 4K advantage is only visible to participants viewing at high resolution, which most video platforms do not stream at full quality — but the HDR and larger sensor produce noticeably better dynamic range in mixed lighting conditions.
Step 4: Place a key light at 45 degrees to your face
Lighting determines more of how you look on video than the webcam quality does. A $60 LED panel beats a $200 webcam in a dim room, every time.
The goal is a key light — a bright, consistent source at roughly 45 degrees off to one side of your face. This produces the flattering single-shadow that makes faces legible and three-dimensional on camera.
Natural light: A window facing you at 45 degrees is free and produces excellent results. The position must be facing you — not directly behind (silhouette) and not dead to the side (harsh half-face shadow). Forty-five degrees off-center is the sweet spot. Time-of-day consistency is the only limitation: late afternoon sun at a west-facing window shifts color temperature and intensity by the hour.
Dedicated LED panel: The Elgato Key Light ($170–200) is an app-controlled LED panel with adjustable color temperature from 2900K to 7000K and full dimming. It mounts on an adjustable desk arm, stays consistent across any time of day, and makes the investment worthwhile for anyone doing four or more calls per day.
Budget solution: Any 5000K daylight LED desk lamp ($25–50) at 45 degrees delivers 80 percent of the result at 20 percent of the cost. Set it to the daylight temperature, angle it slightly toward your face, and optionally bounce it off a white wall or ceiling for diffused light without hot spots.
Step 5: Position the microphone within 12 inches of your mouth
Clear audio requires the microphone to be close to the source. Most laptop microphones sit 18–24 inches away when the screen is at the ergonomically correct distance, which is why laptop audio picks up room echo and sounds thin compared to a dedicated mic.
The ergonomic rule: do not lean forward to reach the microphone. If the mic is far enough away that you instinctively lean in to speak clearly, you have broken your posture baseline from step one. The mic needs to move closer, not you.
Options by type:
USB desk microphone: The Blue Yeti ($100–130) is the reference pick — cardioid polar pattern, built-in pop filter, sits on a desktop stand. Place it 8–12 inches in front of your face, just to one side so it does not block the camera view.
Lapel/clip mic: A USB-C lapel mic stays within 6–8 inches of your mouth regardless of how you sit or move. Price is $25–50 for a wired model. It removes the desk footprint entirely — a worthwhile trade for small or cluttered desks.
Boom arm mic: A cardioid mic on a desk boom arm (such as a Rode PodMic on a PSA1 arm) delivers broadcast-level audio and swings out of the way entirely when not in use. The cleanest ergonomic option for anyone doing daily calls and wanting the desk surface unobstructed.
Step 6: Control your background for a clean camera frame
The area visible behind you carries professional signals and affects video encoding quality. A cluttered, busy background compresses badly at typical video call bitrates, producing a blocky, pixelated backdrop even on a high-quality call.
Background framing rules:
- Sit with a wall 2–4 feet behind you rather than 12 inches — depth in the frame looks more natural and avoids the claustrophobic flat-wall effect.
- Remove objects at head height directly behind you. A plant stem, shelf edge, or pendant light appearing to grow from your head is the single most distracting background element on video calls.
- Add a floor lamp or wall sconce behind you to illuminate the background. A lit background improves how virtual background blur renders and makes the overall image look less flat.
Avoid relying on virtual backgrounds to compensate for a poor physical background. Without consistent lighting and a reasonably solid background behind you, virtual backgrounds produce aura artifacts around hair and shoulders that are often more distracting than the background they were meant to replace.
Step 7: Reduce the tension between screen reading and camera looking
During a video call, attention splits between reading on-screen content and maintaining eye contact by looking at the camera. These two actions require looking at slightly different points — the camera lens is above the top edge of the monitor while faces and slides are below it. Repeated small head movements across this gap cause gradual neck fatigue in long meetings.
To reduce the angular conflict:
- Mount the webcam as close to the top center of the monitor bezel as possible, minimizing the gap between lens and screen content.
- Use gallery view (all participants tiled) instead of speaker view, which requires your eyes to track a moving dominant speaker.
- When speaking directly to someone, look at the camera lens — not at their face on screen. When listening, looking at faces is natural. The other party sees the difference immediately.
Step 8: Ergonomic setup for laptop vs. desktop
Desktop: Fix monitor height and webcam position per steps one through three. The setup holds unless you change equipment.
Laptop: Laptop-flat-on-desk is ergonomically incompatible with video calls. Use a laptop stand to raise the screen and camera, plus an external keyboard to keep typing height separate. This is a $40–80 upgrade that simultaneously resolves call angle and seated posture.
For travel or co-working: a compact laptop stand plus a USB webcam that clips to the raised screen provides consistent call ergonomics on any desk surface. Pack these rather than relying on hotel or co-working desk setups that were designed for neither posture nor video calls.
Best equipment for an ergonomic video call setup
| Product | Best for | Rating | Notes | |
|---|---|---|---|---|
| Ergotron LX Monitor Arm | raises monitor and webcam to eye level on any desk | ★★★★★ | $170-220. VESA 75 and 100. Fixes monitor AND webcam height in one move. 10-year warranty. | Check price |
| Logitech C920 Webcam | best webcam under $100 for home video calls | ★★★★★ | $70-90. 1080p 30fps. Native on Zoom, Teams, Google Meet. No drivers needed. | Check price |
| Elgato Key Light | consistent professional face lighting for 4+ calls per day | ★★★★★ | $170-200. App-controlled, 2900-7000K, desk arm mount. Consistent regardless of time of day. | Check price |
| Blue Yeti USB Microphone | best standalone desk mic for voice clarity on calls | ★★★★★ | $100-130. Cardioid mode, pop filter, desktop stand. Place 8-12 inches from your face. | Check price |
What mistakes undermine ergonomic video call setups?
Laptop flat on the desk. This positions the camera 4–6 inches below eye level for most adults, creating an upward look-up-your-nose angle on the other end and forcing neck flexion during every call. A $30 laptop riser is all it takes to fix it.
Ring light dead center behind the monitor. Direct frontal lighting flattens facial features and creates a flat, washed-out look. Move any light source 30–45 degrees off-center. A window at that angle produces better results than most ring lights at dead center.
Microphone too far from the mouth. A microphone farther than 18 inches picks up more room reflection than voice. If you are leaning forward to be heard clearly, the microphone is too far away — bring it closer rather than moving toward it.
Relying on virtual backgrounds without the right conditions. Virtual backgrounds require consistent, even lighting and a background with clear color separation from your clothing. Without those, the edge-detection bleeds into your hair and shoulders and looks worse than a clean real background.
Looking at faces on screen instead of the camera. Everyone you address perceives your gaze as slightly downcast and distracted — even when you are watching the call attentively. For key moments, move your eyes to the camera lens directly.
FAQ
Frequently asked questions
What is the best webcam height for video calls?
Do I need a ring light for video calls?
How do I stop looking at my screen instead of the camera during calls?
What is the correct microphone distance for video calls?
Can I use a laptop ergonomically for video calls?
How do I reduce echo and background noise on video calls?
Bottom line
Fix the ergonomic baseline first — chair, desk height, monitor position — then layer the call-specific setup on top. The webcam at eye level is the single change that most improves how you appear on calls and removes neck strain from the downward-look posture of a flat-desk laptop camera. Add a key light at 45 degrees, bring the microphone within 12 inches, and orient your desk so window light faces you rather than silhouettes you.
A monitor arm solves webcam height, monitor height, and neck posture in a single upgrade. For more detail on the equipment involved, see best monitor arms, best webcams and microphones for home office, how to reduce eye strain at the computer, and the full ergonomic workstation setup guide.