guides
Keyboard Placement Guide: Ergonomic Position & Angle
Find the correct keyboard height, distance, tilt, and wrist position to prevent wrist pain and RSI at your desk.
 Daniel Osei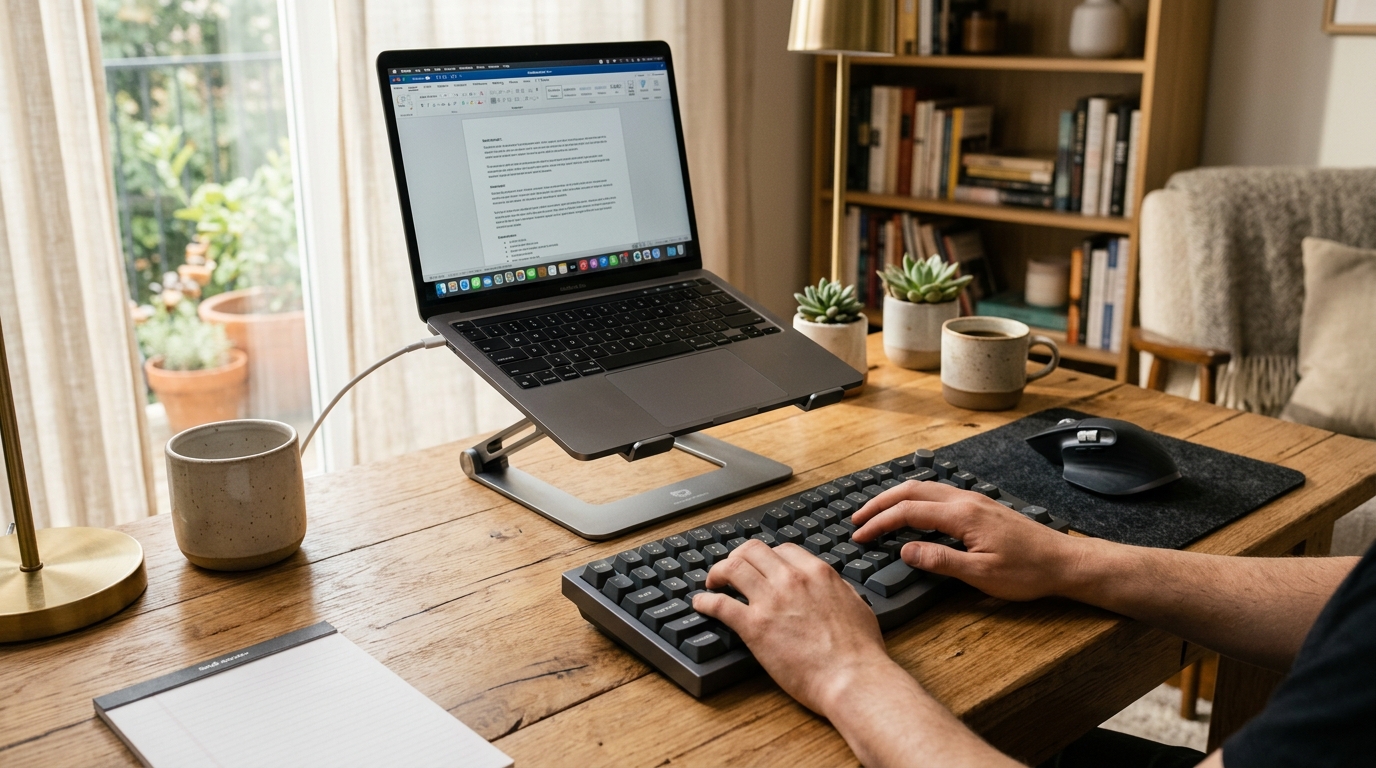
The ideal keyboard sits at or just below elbow height when your arms hang relaxed, roughly 2 to 3 inches from the desk edge, tilted flat or slightly away from you (negative tilt). This keeps wrists straight — not bent up or down — which is the single most important variable for preventing repetitive strain injuries at the keyboard.
Why does keyboard placement matter?
Typing is one of the highest-repetition activities most office workers perform — thousands of keystrokes per hour for hours at a stretch. Small mechanical errors in wrist, forearm, and shoulder position accumulate into repetitive strain injuries (RSI), carpal tunnel syndrome, and tendinitis when those errors repeat millions of times per year.
The ergonomics of keyboard placement are well-understood, and most problems trace back to a handful of correctable setup mistakes — primarily keyboards placed too high, tilted the wrong direction, and positioned too far from the body. Fixing those three variables resolves or prevents most keyboard-related wrist and forearm pain.
The three wrist positions to eliminate:
- Wrist extension: wrists bent back (upward) while typing — caused by a keyboard placed too high or tilted with the back raised
- Wrist flexion: wrists bent downward — caused by a keyboard tilted too steeply away from the user or positioned too low
- Ulnar deviation: hands angled outward at the wrist to reach keys on a straight keyboard — a product of standard full-width keyboards that force the arms inward and the wrists outward
Each of these positions, sustained for hours daily, loads tendons and nerve tissue in ways that compound into injury over time. Neutral wrist position — straight from forearm to knuckle in both the up-down and left-right planes — eliminates all three loads simultaneously.
How to set keyboard placement in 5 steps
Step 1: Adjust your chair before touching the keyboard
Keyboard placement is a downstream measurement from chair height. Your elbow height while seated is the reference point for keyboard position. Before adjusting the keyboard, set your chair so your feet are flat on the floor and your hips are at or slightly above knee height. See how to adjust your office chair for the full sequence.
Adjusting the keyboard before the chair is set guarantees you will need to redo it.
Step 2: Position the keyboard at elbow height
Let your arms hang naturally at your sides. Your elbows should be at 90 to 100 degrees when your hands rest on the keyboard — slightly open rather than a tight right angle. The home row (ASDF row) should sit at or just below your resting elbow height.
What this means in practice: For most adults sitting in a properly adjusted office chair, the keyboard should sit at roughly 27 to 30 inches above the floor. Standard desks sit at 29 to 30 inches — right for a 6-foot person but 1 to 3 inches too high for most people, particularly those under 5 ft 8 in. If the desk is too high for your elbow height, a keyboard tray mounted under the desk is the correct fix — not raising your chair, which shifts your whole seated posture.
Step 3: Pull the keyboard close — 2 to 3 inches from the desk edge
A keyboard placed too far from the body forces the arms to extend forward, raising the shoulders and loading the wrists rather than the forearms. The elbows move away from the torso, and with them goes the stable foundation for neutral-wrist typing.
Pull the keyboard in until the home row sits roughly 2 to 3 inches from the near edge of the desk. Your upper arms should hang nearly vertical — close to the body — not projecting forward. If the keyboard is so close that your elbows move behind your torso, pull it back slightly.
Step 4: Set keyboard tilt to flat or slightly negative
Most keyboards ship with fold-out tilt legs that raise the back of the keyboard toward the user. This positive tilt is the wrong direction ergonomically — it angles the wrists into extension on every keystroke.
Flat (0 degrees) is a major improvement over the raised-back default. Negative tilt — back of keyboard lower than the front — is the ergonomic ideal for users sitting upright or slightly forward. Negative tilt keeps the wrists in true neutral or very slight downward extension, both of which are carpal-tunnel-safe positions. Fold the tilt legs down; if you have a history of wrist symptoms, add negative tilt via a keyboard tray or tilt wedge.
Step 5: Position the mouse immediately beside the keyboard
Every inch the mouse sits away from the keyboard forces the right shoulder into greater abduction — the arm extending outward. Over a day of frequent mouse use, this accumulated shoulder extension is a common cause of right-shoulder and upper-trapezius pain.
Keep the mouse touching or within 1 to 2 inches of the right side of the keyboard. If you use a full-size keyboard with a number pad on the right, the number pad pushes the mouse far to the right. This is the strongest practical argument for switching to a tenkeyless (TKL) keyboard — it closes the gap between your hand and the keyboard by 3 to 4 inches, a meaningful reduction in daily shoulder load.
Flat, negative tilt, or positive tilt — which is correct?
| Product | Best for | Rating | Notes | |
|---|---|---|---|---|
| Positive tilt (legs raised) | legacy preference only | ★★☆☆☆ | Raises the back of the keyboard toward the user. Forces wrist extension on every keystroke. The default out-of-box position for most office keyboards — and the worst ergonomic choice. Fold the legs back down. | Check price |
| Flat (0 degrees) | most users as a solid baseline | ★★★★☆ | No wrist extension from tilt. An immediate improvement for almost every user. Works well when the keyboard is at elbow height and wrists float above the surface. No special equipment required. | Check price |
| Negative tilt (back lower than front) | users with wrist symptoms or pain history | ★★★★★ | Optimal for users in an upright posture with arms slightly extended forward. Keeps wrists in true neutral or mild flexion — both carpal-tunnel-safe positions. Requires a keyboard tray with tilt adjustment or a negative-tilt wedge accessory. | Check price |
Where should wrists be while typing?
The most common keyboard-related mistake is resting the wrists on the desk or a wrist rest while actively typing. Wrist rests are for breaks between typing bursts, not for active keystroke support.
When typing, wrists should float — elevated slightly above the keyboard surface, with the forearms supported by the chair armrests (if adjusted to the right height) or lightly resting on the desk surface when the elbows are in the correct position. Pressing the carpal tunnel against any hard surface — the keyboard edge, the desk, or even a wrist rest — while simultaneously driving the tendons and nerve inside that tunnel loads the structures in exactly the wrong way.
Correct wrist technique:
- Forearms rest lightly on the desk or armrests when hands are away from the keyboard
- When hands move to the keyboard, wrists lift slightly and remain straight — not pressed downward
- After a typing burst, return hands to rest on the wrist pad or desk surface
A wrist pad placed in front of the keyboard helps reinforce this habit by giving the wrists a clear, comfortable landing zone during pauses. For the full breakdown of wrist rest positioning, see wrist pain typing solutions.
Keyboard placement on a standing desk
The same principles apply from a standing position, but the reference height changes significantly. Standing elbow height for most adults is 42 to 48 inches from the floor — 12 to 18 inches higher than the seated position.
The most common standing-desk mistake is leaving the desk at a height intended for seated use and simply standing at a too-low surface. This forces wrists into flexion (hands dropped below elbows) — the standing equivalent of the seated too-high-desk problem.
Set the desk to standing elbow height, keeping the keyboard 2 to 3 inches from the edge with flat or negative tilt. The mouse stays immediately beside the keyboard. For the full standing-desk adjustment sequence, see sitting vs. standing desk and how to use a standing desk correctly.
Keyboard placement for laptop users
Laptop keyboards are inherently problematic because the input and display are permanently joined. When you raise the laptop to correct screen height, the keyboard ends up far too high. When you position the keyboard at elbow height, the screen drops far too low.
The only correct solution for extended laptop use is to separate input from display:
- Raise the laptop on a stand to correct screen height
- Connect an external keyboard and mouse positioned at elbow height
- Treat the laptop screen as an external monitor
The external keyboard should follow the same placement rules — close to the body, flat or slightly negative tilt, 2 to 3 inches from the desk edge. For screen height guidance, see the monitor height guide.
Tools that solve keyboard placement problems
Under-desk keyboard trays
An under-desk keyboard tray solves the most common placement failure: a desk too high for elbow-height typing. Trays lower the keyboard 3 to 6 inches below the desk surface and most offer tilt adjustment for negative tilt — a combination that no desktop keyboard can replicate.
Best for Best keyboard tray for full adjustability
Humanscale 6G Keyboard Tray
The benchmark keyboard tray: mounts under any desk, drops the keyboard well below the desk surface to correct elbow height, and provides a full tilt range including negative tilt. Stable, quiet, and durable enough for all-day use. The integrated mouse platform keeps the mouse at keyboard height and immediately beside the keys — closing the shoulder-abduction gap that a side-mounted mouse creates. Expensive but a one-time investment.
★★★★★ 4.7 · 1,840 reviews
Check current price on Amazon→Best for Best mid-range keyboard tray
3M AKT180LE Under-Desk Keyboard Tray
Adjusts from 1 to 4 inches below desk surface and tilts from 0 to 15 degrees of negative tilt. Includes an integrated mouse platform and installs tool-free on most standard desks. A solid balance of ergonomic correctness and price for users who need below-desk positioning without the premium of the Humanscale option.
★★★★☆ 4.4 · 3,200 reviews
Check current price on Amazon→Ergonomic keyboards
Best for Best mainstream low-profile keyboard
Logitech MX Keys S
A slim, full-travel keyboard that sits flat by default — the correct starting tilt for most users. Comfortable for long sessions, compatible with Mac and Windows, and quiet enough for shared offices. Not split, but the low profile and flat rest angle make it a meaningful upgrade over any standard keyboard with raised tilt legs. Pairs well with an under-desk tray if elbow height requires it.
★★★★★ 4.7 · 12,500 reviews
Check current price on Amazon→Best for Best split keyboard for wrist health
Kinesis Freestyle2 Split Keyboard
Splits into two independent halves that angle to match shoulder width — eliminating ulnar deviation completely. Each half can be tented (inner edge raised) to reduce forearm pronation as well. The Freestyle2 is the most studied split keyboard in occupational health research and is consistently recommended for users with active wrist or forearm symptoms. Expect one to two weeks to fully adapt to the split layout.
★★★★★ 4.5 · 7,800 reviews
Check current price on Amazon→Common keyboard placement mistakes to fix today
Mistake 1: Tilt legs raised. Fold them flat. This single change eliminates wrist extension for the majority of users and takes five seconds.
Mistake 2: Keyboard pushed to the back of the desk. Pull it forward to 2 to 3 inches from the edge. The elbows come in, the shoulders relax, and the forearms finally bear the load they are designed for.
Mistake 3: Wrists resting while typing. Float them. This is a habit change rather than a hardware fix, but it is the most important behavioral correction in keyboard ergonomics.
Mistake 4: Mouse too far right. Move it directly beside the keyboard. If the number pad is blocking, consider a TKL or compact keyboard — the improvement in mouse distance is immediate and persistent.
Mistake 5: Relying on built-in chair armrests for wrist support. Armrests should support the forearm from the elbow to roughly mid-forearm. Resting the wrist on an armrest while reaching the keyboard typically creates more wrist extension than floating does. Adjust armrests to elbow height and let the wrists float.
FAQ
Frequently asked questions
What is the correct keyboard height?
Should keyboard tilt legs be up or down?
How far should the keyboard be from the desk edge?
Should wrists touch the desk when typing?
Is a split keyboard worth it?
Does keyboard placement affect shoulder pain?
Bottom line
Correct keyboard placement comes down to three variables: home row at elbow height, keyboard body 2 to 3 inches from the desk edge, and tilt legs folded flat (or negative tilt if you have wrist symptoms). Chair height sets the reference — adjust it first. Fold the tilt legs down, pull the keyboard close, and let the wrists float above the surface while typing.
If the desk is too high for elbow-height typing, a keyboard tray is the right fix. If you type extensively or have active wrist or forearm symptoms, add negative tilt and consider a split keyboard. For the full workstation setup picture, see how to set up an ergonomic workstation, wrist pain typing solutions, and best ergonomic keyboards.