guides
How to Reduce Hip Pain at Your Desk
Six setup adjustments that address the mechanical causes of hip pain from desk sitting — most require no new equipment to implement.
 Daniel Osei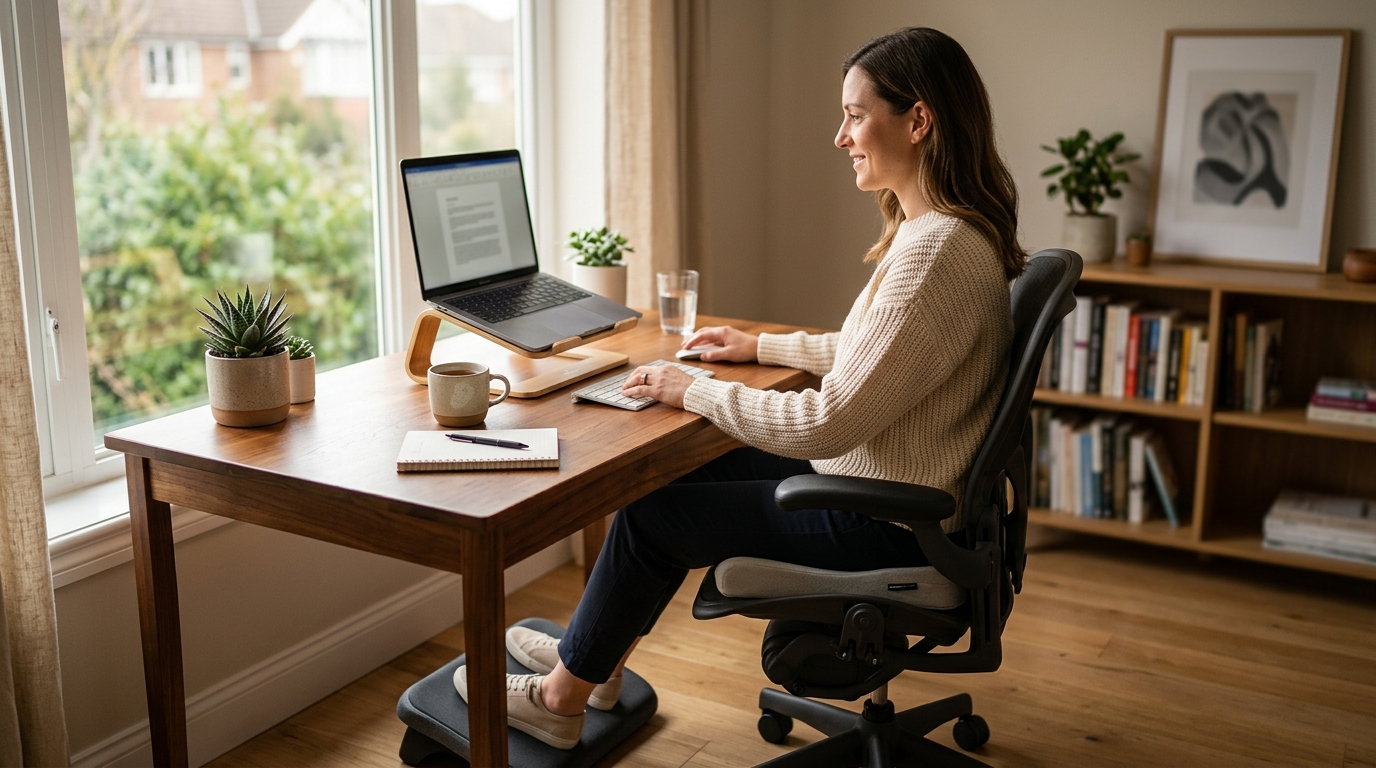
To reduce hip pain at your desk: lower the chair until thighs are parallel to the floor with feet flat, slide the seat pan forward so the front edge stops pressing into the backs of the thighs, and walk for 60 seconds every 30-45 minutes. These three changes address the primary mechanical drivers of desk hip pain and require no purchases.
Why does sitting at a desk cause hip pain?
Hip pain from desk work is predominantly mechanical. The hip joint is designed for movement — walking, standing, climbing — not for holding a fixed 90-degree angle under body weight for hours at a time. Prolonged sitting does three distinct things to the hip that produce pain.
First, the hip flexors (primarily the iliopsoas and rectus femoris) are held in a shortened position throughout sitting. After 20-30 minutes, they begin to adaptively shorten — and a chronically shortened iliopsoas pulls the femur into the hip socket with increased compressive force. That compression, sustained over an eight-hour workday, produces the deep aching that many desk workers describe as hip tightness or hip joint pressure.
Second, the sitting position loads the ischial tuberosities — the bony prominences at the base of the pelvis — and the surrounding soft tissue against the chair seat. A seat set at the wrong height or depth creates uneven pressure distribution across the hip region, cutting into the posterior thighs or concentrating load on one side, which causes localized pain and circulation restriction.
Third, the position of the pelvis during sitting determines the angle of the hip joint. Posterior pelvic tilt (the low-back-against-the-chair, rounded-lower-back posture that most desk workers default into) closes the hip angle and compresses the anterior rim of the acetabulum. This is why hip pain from desk work often feels like groin pressure or a deep ache at the front of the hip, not just the buttocks.
All three mechanisms are correctable through setup adjustments and movement habits. Work through the six steps below in order — the first two are the highest impact and take less than two minutes each.
How to reduce hip pain at your desk: 6 steps
Step 1: Lower the chair until thighs are parallel to the floor and feet rest flat
Chair height is the single most direct determinant of hip angle at the desk. The goal is a thigh angle of roughly 90-100 degrees from the torso — thighs parallel to the floor or angled very slightly downward, with feet resting completely flat and no gap between heel and floor.
Most office workers set chair height based on arm reach to the desk surface rather than hip angle, which results in the seat being too high. A seat too high causes two problems simultaneously: the backs of the thighs press against the front seat edge (restricting blood flow and creating thigh and hip discomfort), and the hip joint is forced into a sharper angle than the joint can sustain without compressive loading.
To check: sit fully against the backrest and look at the crease where your thighs meet your torso. If the angle at the front of the hip is significantly sharper than 90 degrees, the chair is too high. Lower it in small increments until thighs are parallel or nearly so. If correct hip angle leaves feet off the floor, add a footrest rather than raising the chair — this preserves the hip angle while restoring full foot contact.
Step 2: Slide the seat pan forward so the front edge does not press into the backs of your thighs
Even at the correct chair height, a seat pan that is too deep forces the front edge into the soft tissue directly behind the knee — cutting off circulation to the lower leg and creating pressure on the hamstring attachment points just below the ischial tuberosities. That pressure radiates upward into the hip and gluteal area over the course of a workday.
The correct seat depth leaves 2-4 finger-widths of clearance between the back of the knee and the front edge of the seat cushion when sitting fully against the backrest. If your chair has a sliding seat pan, slide it forward until this clearance is achieved. If the seat depth is fixed and too long for your leg length, a seat cushion placed toward the back of the seat effectively shortens the functional seat depth while adding pressure-redistributing foam beneath the hip region.
This adjustment is particularly important for shorter users in standard-proportion office chairs, where the seat pan is often sized for a taller torso and is too long for the legs of smaller-framed people.
Step 3: Engage lumbar support to restore neutral pelvic tilt
Pelvic tilt is the direct upstream cause of hip joint angle. When the lumbar spine is unsupported — the backrest failing to contact the lower back curve — the pelvis rolls into posterior tilt: the familiar desk-sitting slump. Posterior pelvic tilt closes the hip angle from 90 degrees toward something sharper and rotates the head of the femur so that the anterior rim of the acetabulum bears more contact pressure.
Correct lumbar support that presses gently into the natural inward curve of the lower back restores anterior pelvic tilt — which opens the hip angle, reduces anterior acetabular compression, and distributes sitting load more evenly across the sitting bones.
Sit fully against the backrest so hips and lower back both contact the seat back. The lumbar pad should contact the lower back at or just above belt level. If lumbar support is absent or fixed at the wrong height, a lumbar support pillow placed at the correct level resolves this for under $40 in virtually any chair.
Step 4: Keep both feet flat and distribute weight evenly across both hips
Hip pain is frequently one-sided: aching in the left hip or the right, but not both. This pattern almost always points to uneven weight distribution rather than a general setup problem. The two most common causes are crossing the legs and habitually leaning to one side while working or reaching for a mouse.
Crossing the legs for extended periods loads one ischial tuberosity with nearly double the body weight while rotating the pelvis, compressing the sacroiliac joint on one side, and placing asymmetric tension on the hip capsule of the raised leg.
The fix: place both feet flat on the floor (or footrest) and confirm that sitting bones are equidistant from the floor. Position the mouse as close to the keyboard as possible to minimize the lateral reach that drives leaning. A reminder note on the monitor helps for the first week — the habit of leg crossing is deeply automatic and typically requires conscious interruption to break.
Step 5: Position the monitor and keyboard so you stop leaning forward
Forward lean — reaching toward the keyboard or craning toward a monitor that is too far away — shifts body weight toward the front of the seat. That forward weight shift increases pressure on the thighs and pulls the pelvis into an uncontrolled anterior rotation, concentrating load on the sitting bones against the forward edge of the seat rather than distributing it evenly across the cushion.
Position the keyboard at the distance where forearms rest parallel to the floor with upper arms hanging straight down and shoulders completely relaxed. Position the monitor at roughly arm’s length — 20-28 inches from the eyes — with the top edge at eye level. These two positions together eliminate forward lean from both the arm reach and the screen gaze, keeping body weight centered and evenly distributed across the seat.
Step 6: Take a 60-second standing break every 30-45 minutes
Hip flexor shortening is the primary long-term driver of persistent desk hip pain, and no seat adjustment eliminates it entirely — only movement does. The iliopsoas requires length restoration through active hip extension (walking, standing with the hip in extension) to release the compressive adaptation built up during sitting.
Set a recurring alarm for every 30-45 minutes. When it fires, stand and walk at any pace for 60-90 seconds. This is the minimum mechanical dose. If the alarm is too disruptive for focus-intensive work, a height-adjustable standing desk converter makes position changes frictionless and keeps walking breaks optional rather than mandatory — but the 30-45 minute movement interval still applies even at a standing desk.
Common causes of hip pain at a desk
| Product | Best for | Rating | Notes | |
|---|---|---|---|---|
| Chair height too high | cuts into backs of thighs and forces the hip joint into a compressed, painful angle | ★☆☆☆☆ | Lower chair until thighs are parallel to the floor with feet flat. Add a footrest if feet leave the floor. | Check price |
| Seat pan too deep | presses front edge into thighs and restricts blood flow to the hip and lower leg | ★☆☆☆☆ | Slide the seat pan forward or add a seat cushion to shorten the functional depth. | Check price |
| No lumbar support | causes posterior pelvic tilt which compresses the anterior hip socket over hours of sitting | ★☆☆☆☆ | Position lumbar support at belt level to restore neutral pelvic tilt and open the hip angle. | Check price |
| Uneven weight distribution | loads one hip joint asymmetrically and builds cumulative strain across the workday | ★☆☆☆☆ | Place both feet flat and ensure sitting bones are level. Stop crossing legs during extended sessions. | Check price |
| No movement breaks | hip flexors shorten continuously and compressive force on the hip joint increases over time | ★☆☆☆☆ | Walk 60-90 seconds every 30-45 minutes. A standing desk converter makes position changes effortless. | Check price |
Gear that relieves desk hip pain
The setup adjustments above address most desk hip pain without any purchases. Three categories of gear deliver reliable additional relief when adjustments alone fall short.
Best for Redistributing pressure away from the hip joint and sitting bones during long sessions
Ergonomic Seat Cushion with Coccyx Cutout
A memory foam seat cushion with a rear coccyx cutout redistributes body weight away from the ischial tuberosities and hip joint — the primary pressure points that cause desk hip pain in a standard flat chair seat. The Everlasting Comfort seat cushion and the ComfiLife orthopedic seat cushion are well-reviewed options in the $30-45 range that fit any existing office chair without modifications. A coccyx cutout is essential for true hip pain relief; a plain flat foam cushion adds softness without solving the pressure distribution problem.
Check current price on Amazon→Pros
- Redistributes pressure away from the hip joint for immediate relief
- Works in any existing office chair without requiring a replacement
- Portable for use in the car, on flights, or at a secondary workspace
- Under $45 — confirms whether seat pressure is the root cause before committing to a full chair purchase
Cons
- Does not address seat height, seat depth, or lumbar support gaps in the chair
- Memory foam compresses after 12-18 months of daily use and needs replacing
- Raises the seating surface 2-3 inches — users near maximum chair height may find feet leave the floor
Best for Users whose feet leave the floor when chair height is set correctly for the hip angle
Adjustable Under-Desk Footrest
When a user raises the chair to the correct hip angle — thighs parallel, no pressure behind the thighs — feet may leave the floor entirely. Without foot contact, the legs dangle and the hip flexors must work continuously to support their weight, generating additional fatigue and compressive load in the hip region throughout the day. An adjustable footrest brings the floor surface up to meet the feet at any chair height. The Everlasting Comfort footrest and the Mind Reader footrest both offer adjustable tilt angles and a gentle rocking motion that promotes lower-leg circulation during long sitting sessions.
Check current price on Amazon→Pros
- Solves the chair-height vs. foot-contact tradeoff for shorter users at standard-height desks
- Rocking motion promotes circulation and reduces hip flexor fatigue during long sessions
- Under $40 for a fix that would otherwise require a full height-adjustable desk
- Compact footprint fits under any standard desk without obstructing legroom
Cons
- Does not help when the desk surface itself is the height bottleneck
- Tilting platform takes a few days to feel natural for users accustomed to flat floors
- Must be sized correctly — a footrest too tall raises hips above the correct thigh angle
Best for Interrupting the hip flexor shortening cycle that causes chronic desk hip pain
Height-Adjustable Standing Desk Converter
A standing desk converter is the most effective single tool for desk hip pain because it interrupts the sustained hip flexor shortening that standard seated work imposes continuously. Alternating 30-45 minutes sitting and 30-45 minutes standing allows the hip flexors to return to their resting length during standing intervals. The FlexiSpot E1 converter and the Flexispot M7B are well-reviewed options with stable work surfaces large enough for a monitor, keyboard, and mouse. Pair with an anti-fatigue mat — the Topo by Ergodriven or the Kangaroo mat — for standing intervals, as standing without cushioning simply shifts hip joint load rather than relieving it.
Check current price on Amazon→Pros
- Interrupts hip flexor shortening — the primary mechanical driver of chronic desk hip pain
- Alternating sitting and standing is more effective than pure sitting or pure standing all day
- Lower cost than a full motorized height-adjustable desk
- Requires no installation and saves the existing desk
Cons
- Reduces usable desk surface area compared to working on a clear desk
- Requires an anti-fatigue mat for standing intervals — additional cost of $50-100
- Dual-monitor users may find converter width limiting at mid-range price points
- Does not correct seated hip angle — the other setup steps above still apply
What to skip
Hip flexor stretches as the primary fix. Desk hip flexor stretches — the standing lunge, the kneeling hip flexor stretch, the pigeon pose — provide genuine temporary relief, but if the root setup is unchanged, the hip flexors re-shorten within 20-30 minutes of returning to the chair. Use stretches as a complement to setup corrections and movement breaks, not as a substitute. A stretch at lunch followed by six more hours of unsupported sitting makes no durable difference.
Heating pads during the workday. Heat increases blood flow and relaxes muscle tissue, which relieves the symptom of tension without addressing the cause. A heating pad applied while sitting re-relaxes muscles that will re-tighten continuously as long as the posture loading them remains unchanged. Reserve heat for temporary pain relief in the evening — not as a desk intervention during working hours.
Replacing the chair before diagnosing the root cause. Many users with desk hip pain replace their chairs and experience the same pain within weeks because the root issue was seat depth or movement frequency, not chair quality. Work through the six steps above first. A new chair is worth evaluating after confirming through adjustment that better adjustability would solve a problem the current chair cannot — not as a first response to the pain itself.
FAQ
Frequently asked questions
What does hip pain from sitting at a desk feel like?
How long does it take for desk hip pain to go away after fixing the setup?
Is one-sided hip pain from desk work serious?
Does a standing desk eliminate hip pain from sitting?
Can a seat cushion fix hip pain from a desk chair?
Which chair adjustments help most with hip pain?
Bottom line
Start with two free adjustments: lower the chair until thighs are parallel to the floor, and slide the seat pan forward until no pressure cuts into the backs of the thighs. Add lumbar support at belt level to restore neutral pelvic tilt. Then set a 30-45 minute timer and walk for 60-90 seconds each time it fires — this is the mechanical requirement for hip flexor health that no seat adjustment can replace.
If pain persists, add a coccyx seat cushion as the first purchase (under $45) to redistribute sitting bone pressure, and a footrest if feet leave the floor at the correct hip angle. A standing desk converter is the highest-impact tool for chronic desk hip pain and delivers a meaningful improvement in comfort within the first week of alternating sit-stand intervals.
For related guidance, see how to fix back pain at your desk, best anti-fatigue mats, best standing desks, and how to set up an ergonomic workstation.